|
|
|
|
| Paint-Your-Own Car Collection | Contents | |
|
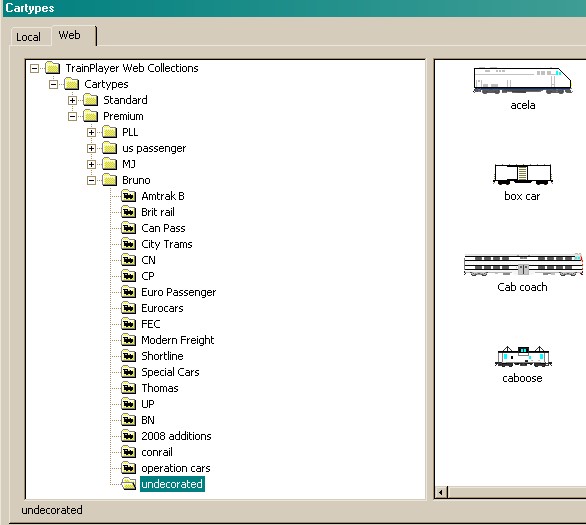
We may all remember that time when we were looking for or hoping to build a railroad of your choosing. You would populate the rails with your personal choice of boxcars, reefers and really cool engines with hot artwork. Customizing your own Car collection is the equivalent of taking a pre-built set of "Undecorated cars" and sending them to your own paint shop to be prepared to run on your personal empire. This section describes how to take those undecorated cars and apply paint - MS Paint that is!! Locating the Undecorated Car Collection The Undecorated Car collection is available to holders of a TrackLayer Builder license and can be found on your web chooser under Cartypes\Premium\Bruno
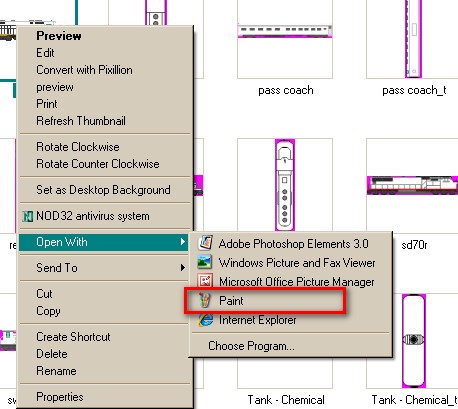
There is a collection of 20 different car and engine types from the modern diesel era. Download the collection to add it into your Local chooser. All of the car sides and top images are in Bitmap (BMP) format for image fidelity and simplicity. There are two ways to work with this collection. First you can decide to Paint all your cars outside of TrainPlayer and save your new drawings in their own folder. The second method involves accessing MS Paint inside of TrainPlayer and doing your work there. NOTE: We are recommending that you first create a new folder inside your Trainplayer\Cartypes folder into which you will place your finished paint work. This is the "fail safe" approach and least likeliest to cause you problems Option 1: Working with MS Paint directly If you are comfortable with Windows Explorer, locate your Car collections files. They will likely be under either: Vista - C:\Documents and Settings\Administrator\Application Data\TrainPlayer\Cartypes or for XP/XP Pro ---- C:\Programs\Trainplayer\Cartypes Once you have found your newly downloaded Undecorated car collection, do a right mouse click on any image to bring up this menu:
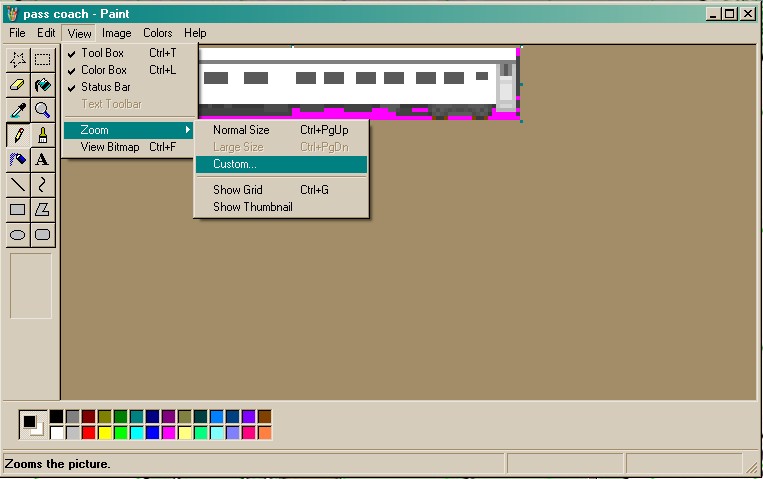
As indicated, go to "Open with" and Select Paint from the next menu. When Paint opens the image, it is usually tiny and needs to be magnified. Select "Custom"
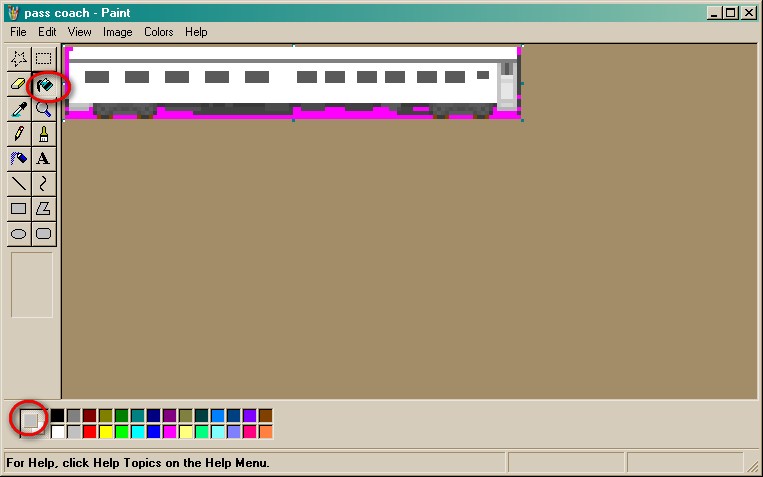
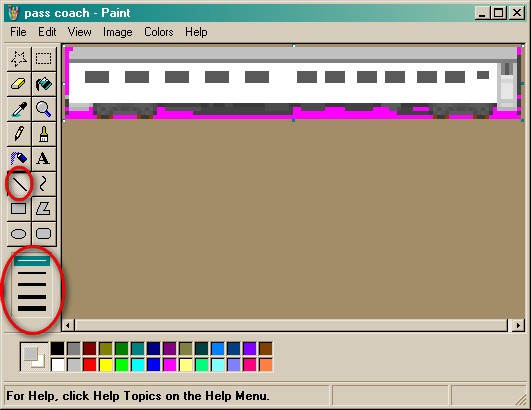
and pick either 600% or 800% magnification. MS Paint provides you with a variety of Tools on the left hand side. We will not be going into any great detail on any of these tools in this tutorial so you may want to experiment with it yourself. We will be using primarily the Pencil tool for individual pixel details, the Ink Bottle to Fill large areas and the Line tool to draw crisp straight lines. For the passenger coach that we have selected, we want to add some distinguished colours to suit our main revenue train to distant parts of our rail domain.
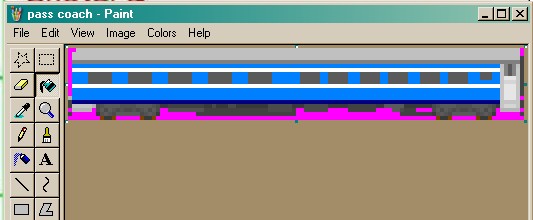
First we give the roof of the car that nice aluminum finish by selecting the Fill tool and the light grey colour. Then we want to add a dark blue stripe at the base of the car by using the narrowest of the Line tools Then we follow that with light blue finish over the rest of the car. To set off the windows, we add back a white stripe above and below the windows. This is what our finished car now looks like:
Before we move on to the car top, we need to save our work.
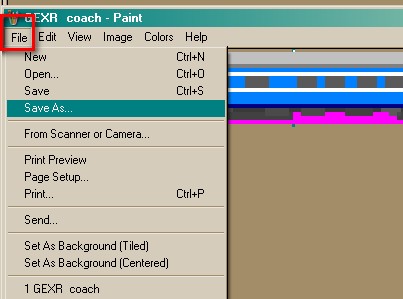
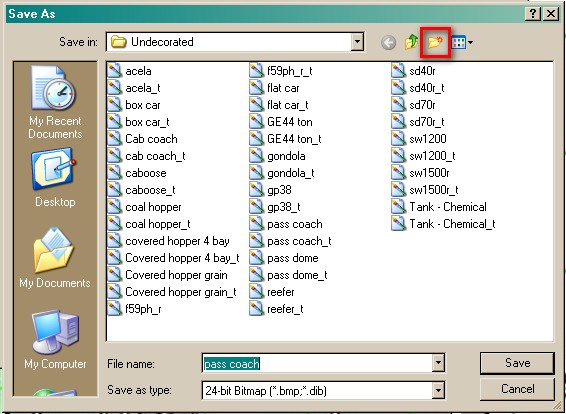
Select "File - Save as" to bring up the next menu. Give your new creation a name - in this case GEXR coach. If you have not already created a new folder for your work, you can select it from the next menu by clicking on the New Folder icon In this case, we had already created a new folder named GEXR for our new cars. You can do this in Windows Explorer by highlighting your Cartypes main folder and selecting : File\New folder from the top left menu bar. Next step is to locate the related car top and Paint it too!!
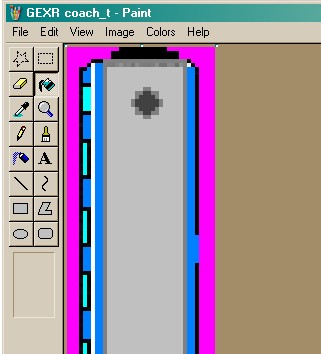
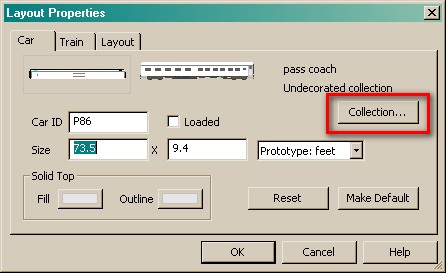
Since we want the overall appearance to be similar, we "Fill" the roof area with the Light Gray "aluminum" color. We add the blue colour to the coach sides. And finally we finish off the new look with a white stripe over the window tops. As we did above, we now rename the coach top to match the new name given to our coach <<GEXR coach_t>> and save the coach top in BMP format and in the same folder where we placed the car side image. Use these same techniques to add whatever other "custom" cars to your home railroad Option 2: Working with MS Paint inside of TrainPlayer Once you have downloaded the Undecorated car collection from the web chooser, you can access it from your Local chooser. On any track section on any open layout, select Add a new Car\Other to bring up your Local chooser again. Select and add any car from the Undecorated collection. Click done. On that newly added car, do a right mouse click to bring up the Properties submenu: Now click on Collection to drill down to the individual car level.
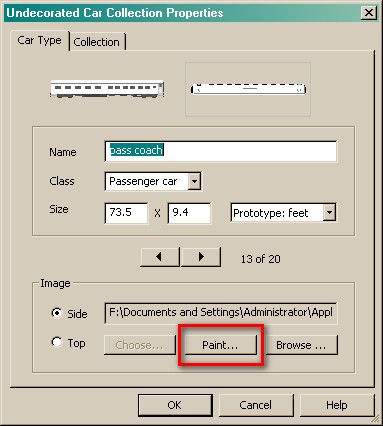
You can see that we have chosen the "pass coach" image. Now we can select Paint from the first row of buttons. And then Paint opens in its own window
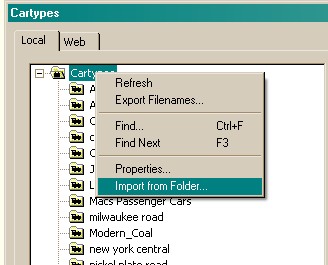
Follow the steps under "Option 1" to custom paint and save your new work. Adding your New Car folder to TrainPlayer Once you have completed adding all the cars and engines to your new collection, you need to add it into TrainPlayer so that you can put them into revenue service. If you created a new folder inside of your TrainPlayer\Cartypes as we recommended at the beginning, then you should be able to add your collection quickly and easily. Open your Local Car chooser, with the Cartypes highlighted, do a right mouse click and from the pop up menu, select "Import from Folder"
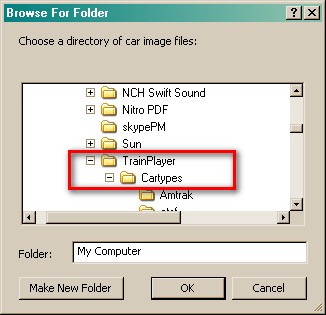
Then Browse through your C: drive as follows:
Click "documents and Settings, then click on Administrator. Next click on Application Data, then locate TrainPlayer\Cartypes and click on them. Finally you should come to your new folder listed under car types. Double click and it will be loaded into TrainPlayer. Each car top is identified in your files with the " _t " designation. In the case of our newly created car, the car side was renamed: "GEXR coach.bmp" and the corresponding car top is called "GEXR coach_t.bmp". So long as you carefully follow that rule, you should not have any issues with adding new cars. If you do experience difficulties, then drop us a line.
|
|
| Copyright © 2005 - 2014, TrainPlayer Software |
