Step 1 - Creating Locations for the Industries and Yards
|
Create New Location
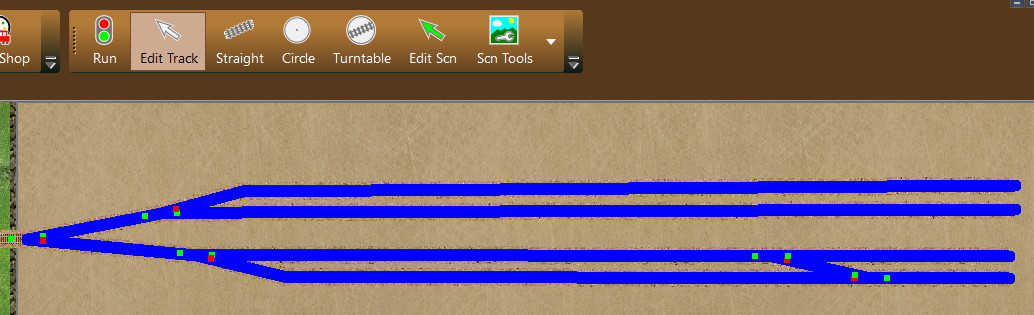
We started by selecting the tracks for the Staging area at the extreme right hand end of the layout and defining these as 'East New York Staging'.
|
To create our first location we selected the Edit Track tool, dragged a box around the tracks to be used as Staging, then right clicked on the selection and chose Create New Location to open the New Location dialog.
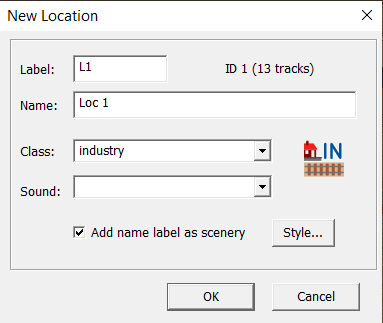
This dialog always defaults to Class Industry with a basic label and name.
It always makes good sense to change this default label and name into something meaningful which describes the Location.
|
Editing the Location data
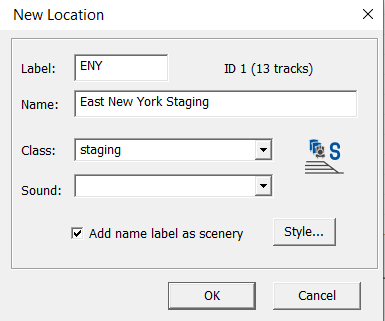
We changed the default Label to 'ENY', changed the name to 'East New York Staging' and set the Class type to 'Staging'.
We retained the check mark to display the new Name as a scenery label.
The Sound menu lets you add a sound to any location.
The Style button lets you change the font style, border and background which is used on the scenery label.
Note: Location Labels can be alphabetic, alpha-numeric or numeric-alpha but not purely numeric. Codes used should also be short enough to fit on a car top as a destination label.
|
Adjusting the Location Label display.
The label given to the New Location only appears on one of the highlighted tracks when you click OK.
All tracks which make up this location are also given the same label but most of these labels are hidden to reduce visual clutter. You can adjust the Track Label display if necessary.

To display the label on other track segments we kept the Edit Track tool active, right clicked on the appropriate track segment and selected Show Label from the context menu.
The Scenery label was re-positioned using the Edit Scenery tool from the Build toolbar to drag the label to its new position.
|
Defining the second Staging Yard
We repeated this procedure to add another Location for the second Staging yard at the left end of the layout.
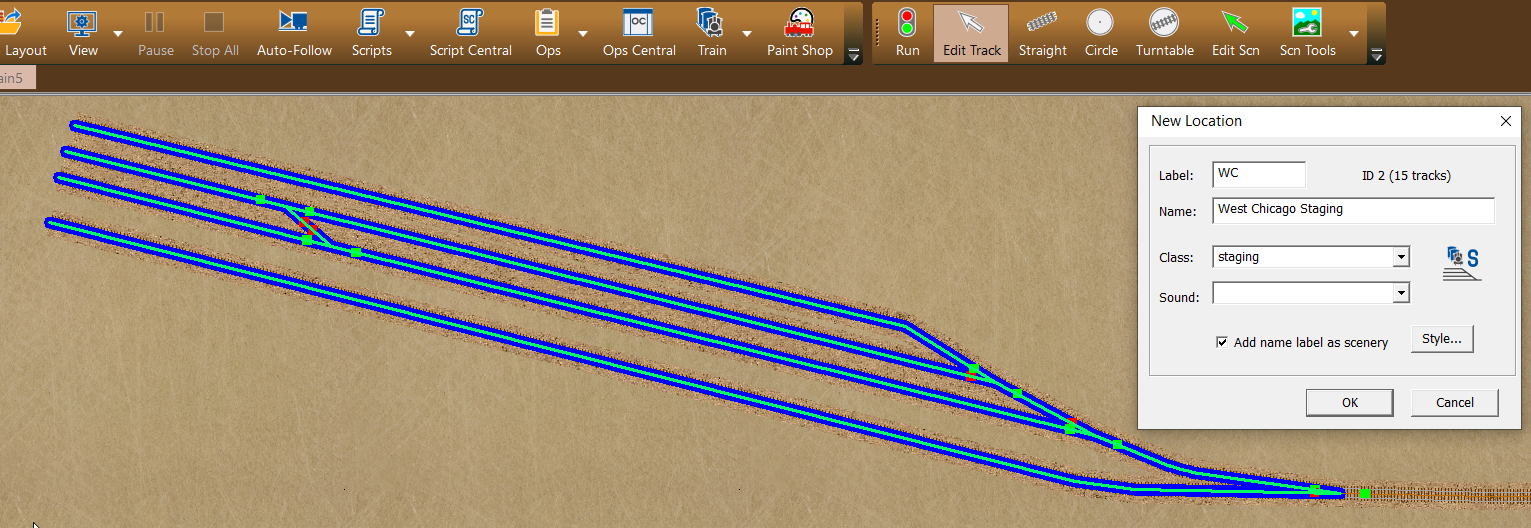
Recap: The Edit Track tool was used to highlight the tracks for the new Staging yard - draw a box around or through the tracks, or use Shift Click on the individual segments.
Create New Location was selected from the track context menu and the New Location dialog was edited to label and name the new location [WC= West Chicago Staging].
We set the Class as Staging from the Combo menu and retained the checkmark to generate a scenery label.
We then clicked OK to apply the changes to the layout.
With two Staging areas we have two sources of traffic but Bruno had also added an Interchange at Mount Brydges to provide an extra source of traffic for the industries.
|
Defining the Interchange
We used the Edit Track tool to highlight the tracks needed for the Penn Central Interchange, selected Create New Location from the track context menu and edited the New Location info.
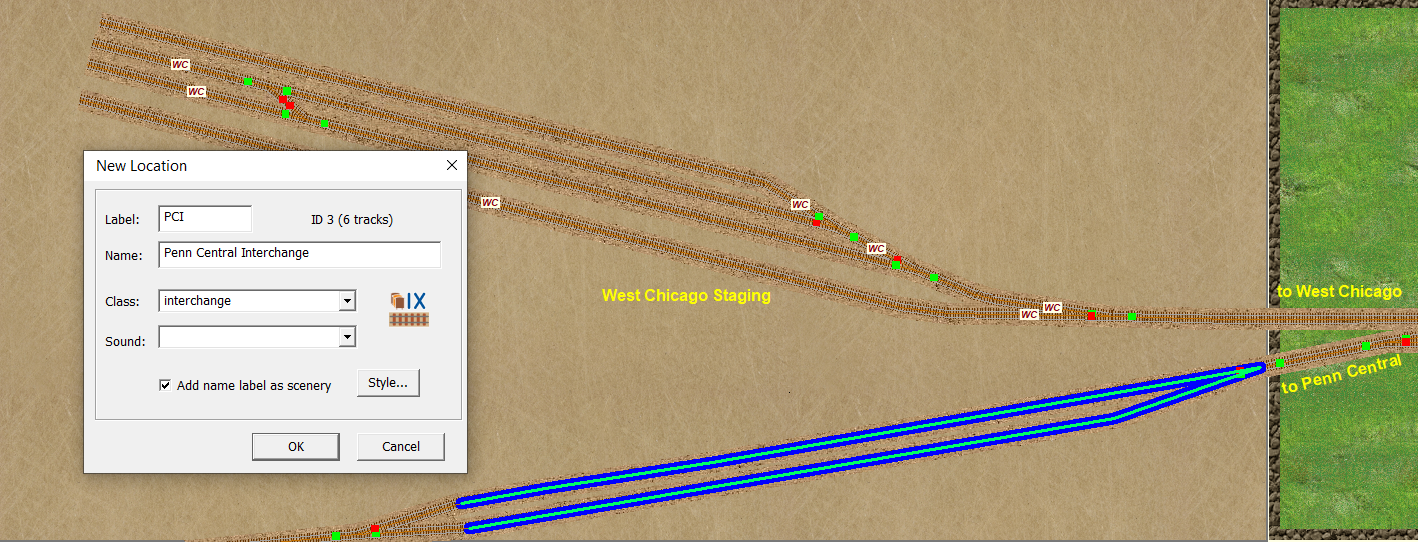
The edit included providing the PCI label and full name data, and ensuring that the location class was set to interchange.
Clicking the OK button applied the new data to the layout. The visible track labels were adjusted from from the track context menu, and we used the edit scenery tool to move the text label.

We recommend saving the layout often when creating Locations so this was a good moment for us to click on the Save button.
|
Class Yards add interest
If we were to create all our Industries at this stage we would end up with three Peddler trains, one from each staging yard and one from the Interchange, with each of them authorized to visit all our Industries.
Bruno wanted more complexity than this and his next step was to add a Classification Yard to process the inbound and outbound traffic.
This yard will receive cars from both staging yards and provide two local trains to distribute these cars. The engine from the Class Yard will also run a local Turn between the Industries and the Interchange - making an interesting five train sequence.
|
Defining the Class Yard
Setting up the Class Yard [Elwood Yard] at Mount Brydges used exactly the same processes as we have been using so far.
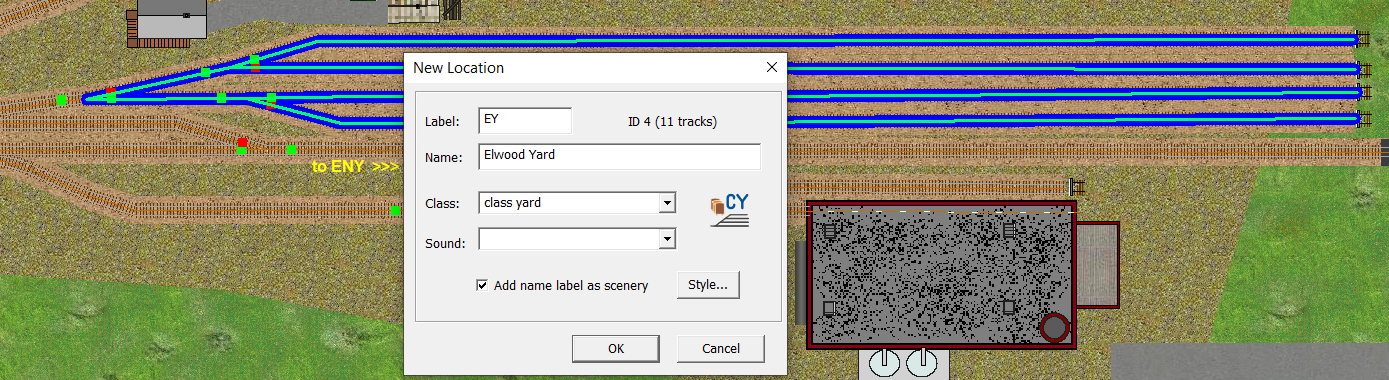
We selected the tracks, labeled our location as EY, named it as 'Elwood Yard' and used the combo menu to make it into Class Yard. Then clicked OK to move on.
|
Defining an Engine Track
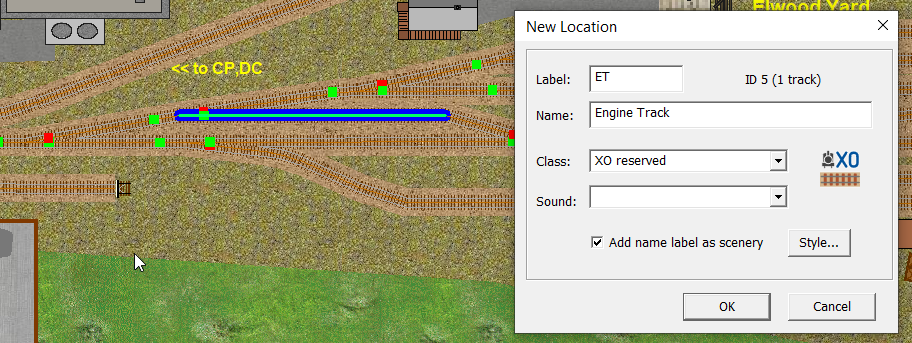
Elwood Class Yard is to be the hub of our operations and required its own engine to handle the local switching.
The switcher could operate from within the yard itself but we decided to give it a dedicated ET engine track to work from. The procedure is the same, the Class setting needs to be 'XO reserved'.
|
The Locations grid
Before we started defining our Industry locations we decided to take a look at what had been going on in the background as our new locations were being created.
So we selected the Ops Central tool button from the Ops toolbar and opened the Locations tab to see that all five of our new locations are now included in this grid.
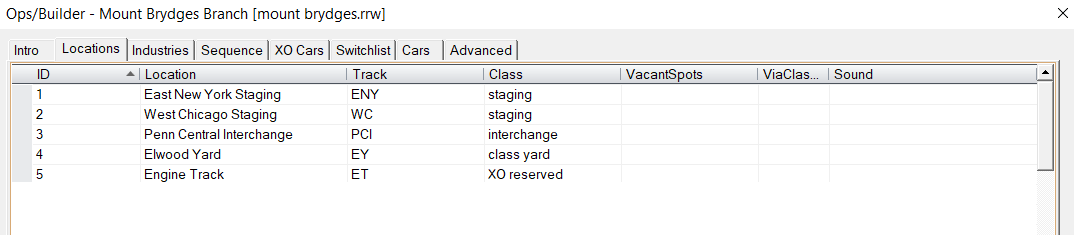
At this stage we still needed to add some Industries for our trains to service.
|
Creating an Industry
We used the Edit Track tool to highlight the tracks for our first industry and chose Create New Location from the context menu.
|
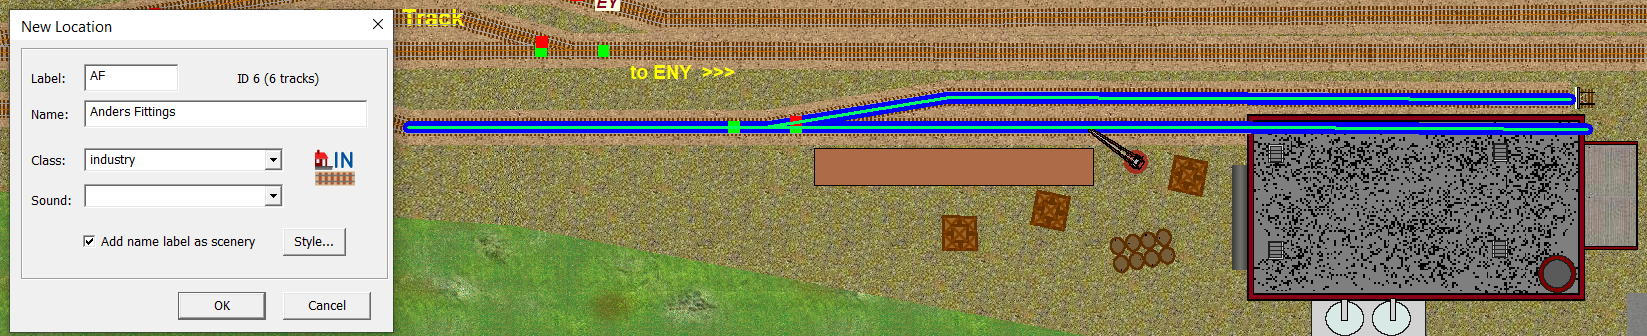
This industry was labeled as AF, allocated the name 'Anders Fittings' and the 'industry' class was selected from the combo menu. The checkmark was retained to ensure that a name label was added to the scenery.

Clicking OK committed the data to the track plan and added a new row to the Ops Central Locations grid - see row 6 in the table below.
|
Repeat for all Industries
We repeated these actions for all other Industries on the layout. You should now be familiar with the process.
The Ops Central Locations grid of our example layout can be opened from the Ops toolbar. If you need to make any changes this data can all be edited within this grid.
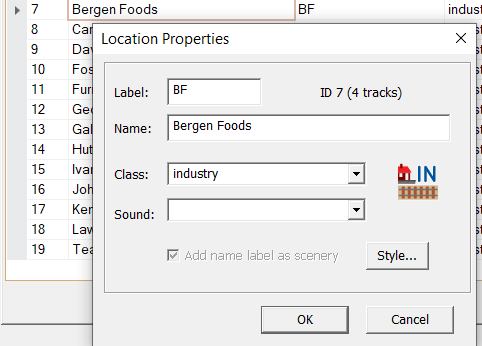
Adjustments can also be made by right clicking on the location name and selecting Location Properties from the context menu. This dialog is similar to the New Location tool.
Note: An Advanced Ops layout must have at least one Staging yard, or Interchange, and several industries. Class yards and XO reserved tracks are useful but not essential.
|
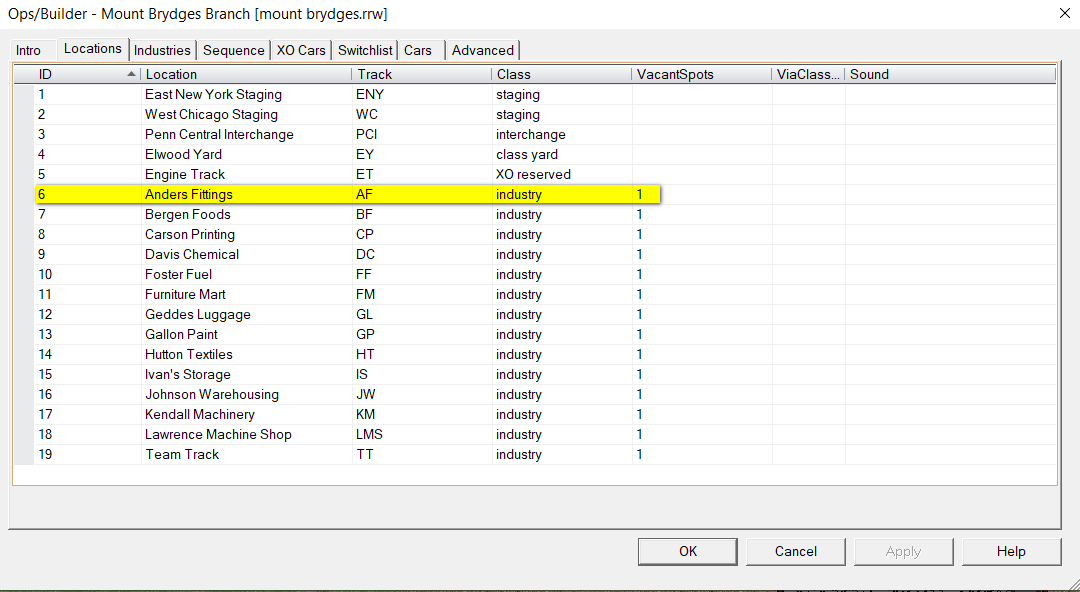
Each new Industry added to the grid will display a VacantSpots value of 1. This assumes space to accept one additional car.
VacantSpots will need to be recalculated in Step 3 when the cars have all been positioned and can be compared with the actual track capacity. If you intend using FixOps to assist in building the Ops grids this calculation will be taken care of automatically.
|
|
The next job was to work through the new locations and add some cars.
This was also a good time to click the Save button and protect the work so far.
|
Step 2 - Populate the layout with cars suitable for the needs of the Industries
|
Traffic Flow
The needs of the Industries generate the traffic flow for the layout. So the Switchlist Generator works on the assumption that Industries dispatching their loads or returning their unloaded cars to Staging will be repeating these actions on a regular basis.
The assumption is that all cars already standing at an industry will require pulling and moving on. After a car has been pulled then at some point that same industry will require a replacement load from Staging (or another empty car to load).
The busiest industries will always handle the most cars so the layout designer only has to select and place his cars at the Industries in the proportions that reflect the ratio of movements required.
|
Adding Cars
Placing cars at Industries requires careful planning to ensure that the car types used are appropriate to each industry's function.
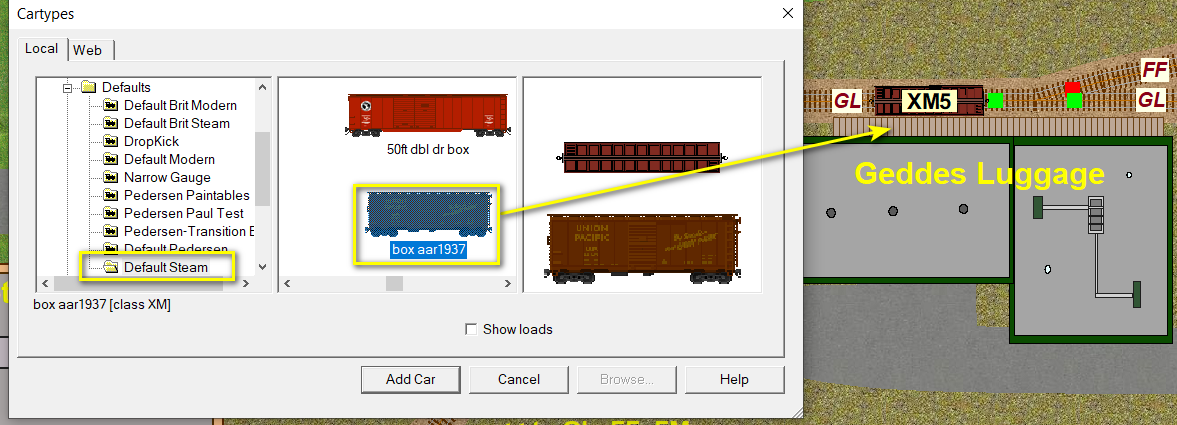
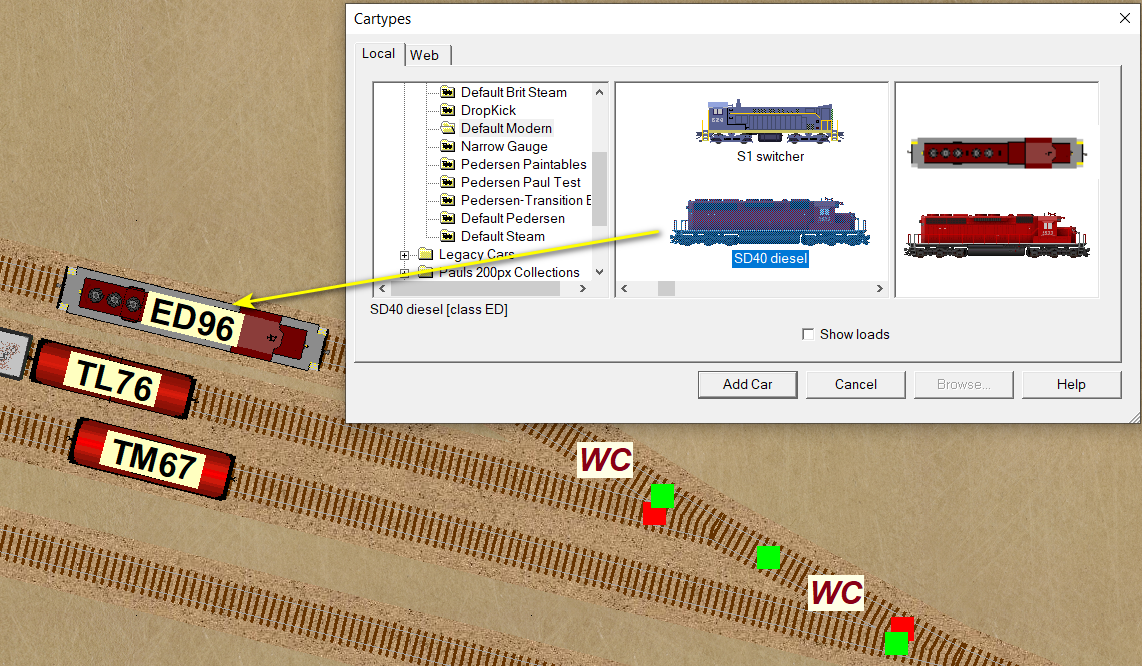
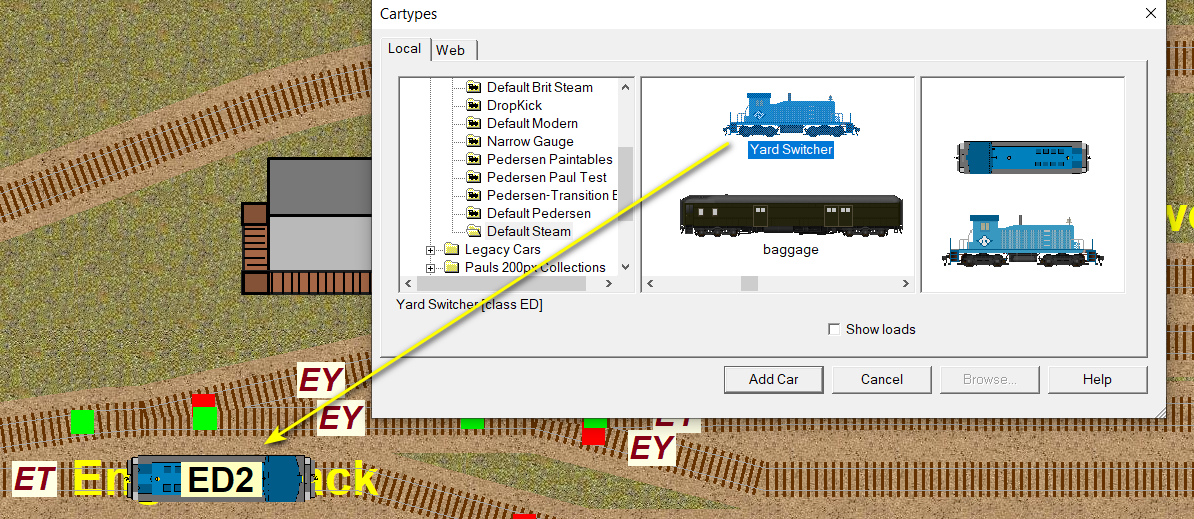
We opened the Car Chooser from the Tools menu, selected the cars from the center pane and dragged them into place at the industries.
Double clicking in the chooser adds extra cars to the same location. Cars can be taken from different car sets.
Cars can also be added from the Car Inventory Bar.
|
In addition you can add cars by right clicking on the Location track and selecting Add Car Here from the context menu.
The Car Chooser or Car Inventory Bar can also be opened from this sub-menu.
|
Repeat for all Industries

We repeated this process until all the industries on the layout had been populated with appropriate cars.
Adjacent unlabeled tracks (or running lines) should be kept clear of cars to permit the operation of your trains.
|
The number of cars placed at each industry manages the volume and flow of traffic. So if industry A only ever handles one car type and a single commodity but is set up to handle four cars; while industry B is also set up for 4 cars but handles 10 different commodities (loadname entries in the industries grid). Then these two industries would handle exactly the same amount of car traffic, but you would see a lot of A's loads while the individual loads for B would be much less frequent.
In our example on the left KM has one car, JW and HT each have two cars and LMS has four cars.
This ensures that JW and HT will always be tasked with twice the traffic of KM, while LMS will be tasked with twice the traffic of JW and HT, and four times the traffic of KM.
If you need an industry to handle more car types than the capacity of the industry, this can be achieved by adding extra car orders for the additional car types into the Industries Grid during Step 3.
|
Populating Class Yards

Cars in Class Yards should always be fewer than the default setting for CarsToPull [see OC grid Advanced tab] multiplied by the number of staging yards on the layout.
|
Only AAR car types already used at the Industries should be placed into Class Yards. These cars are assumed to be on the return leg of their journey.
They will be pulled and returned to Staging by the first Fast Freights which call to deliver more new cars to the yard for distribution to the industries.
|
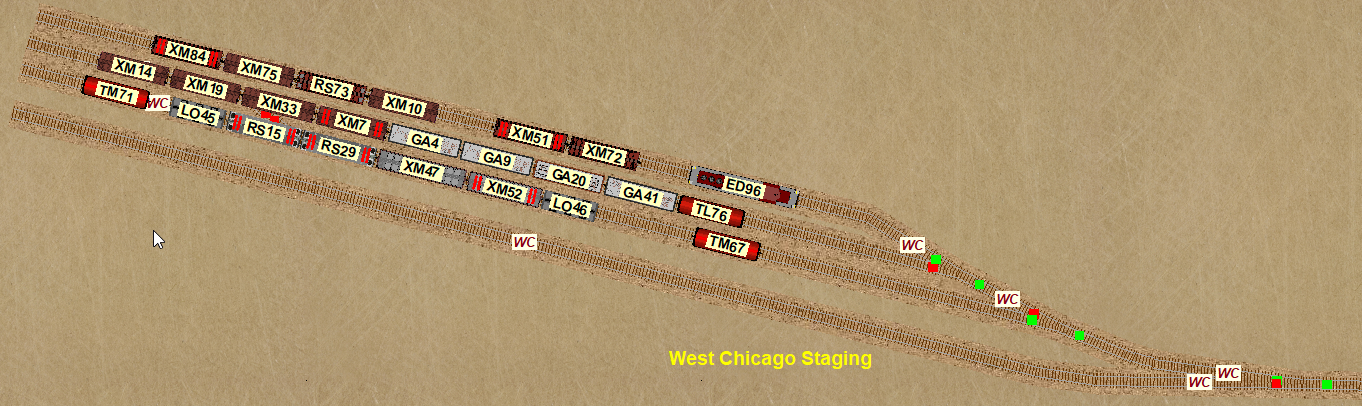
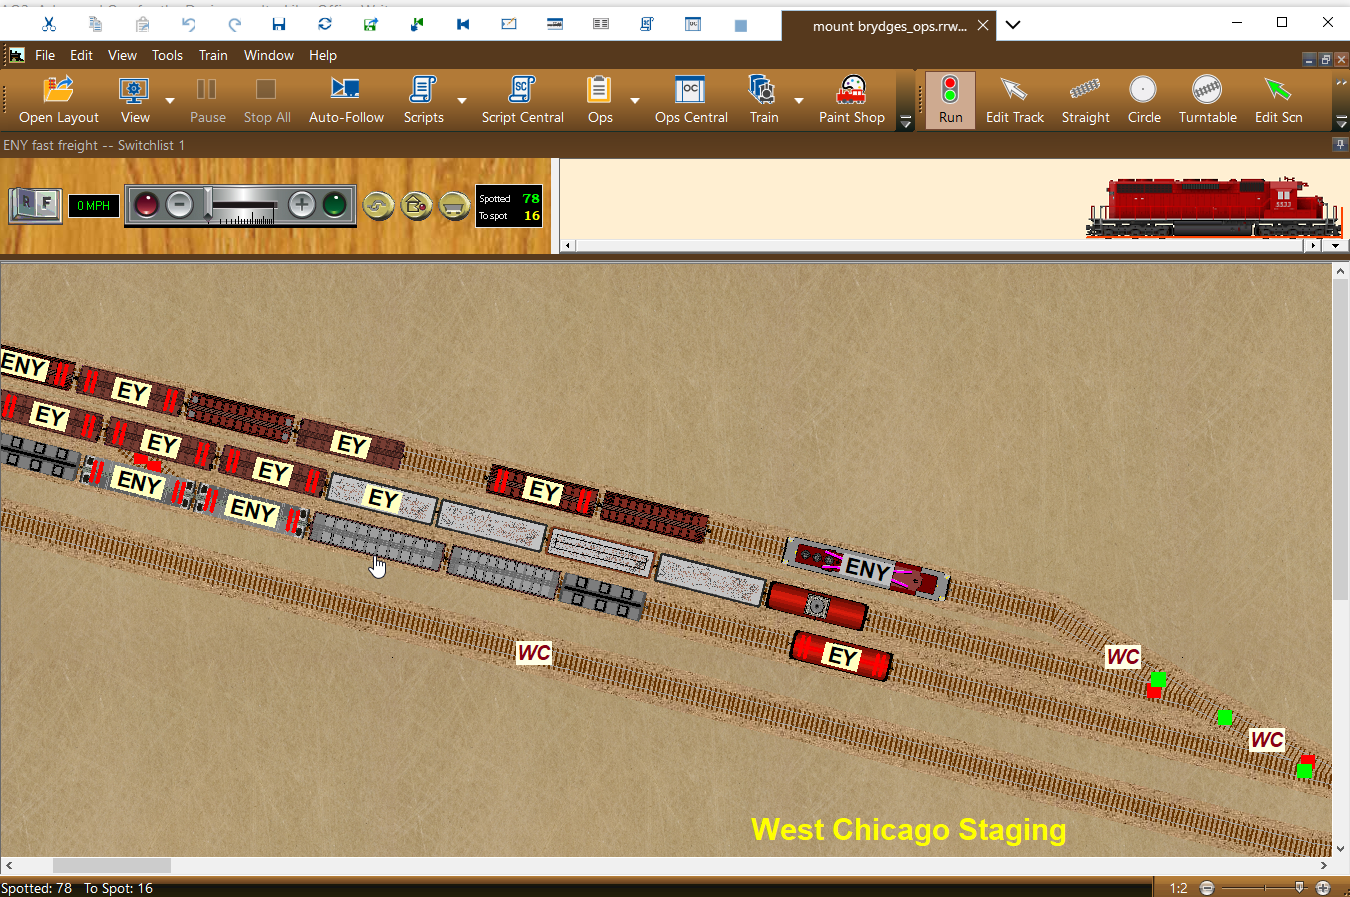
Cars in Staging

|
Cars in Staging should be a mix of the same AAR types used by all your Industries, we recommend the number of cars for a Staging area should be around one and a half times the defined CarsToPull value but this is not a hard and fast rule.
[See OC grid Advanced Tab for CarsToPull value.]
If the first train to terminate at a Staging yard starts out from a different location you should ensure that the receiving yard has sufficient free space to accept the incoming train.
|
Cars in Interchanges
Cars in Interchanges should be a mix of the same AAR types which are used by the industries served by the Interchange.
The number of cars placed at Interchanges should not exceed the CarsToPull value as it is assumed that all cars found here are for the Industries.
|

[See OC grid Advanced Tab for CarsToPull value.]
|
An AO Layout needs at least one Engine
|
Engines can be placed in Staging yards, on XO reserved track or in Class Yards.
Engines should not be positioned on Interchange tracks or at Industries.
|
Understanding the Cars grid
|
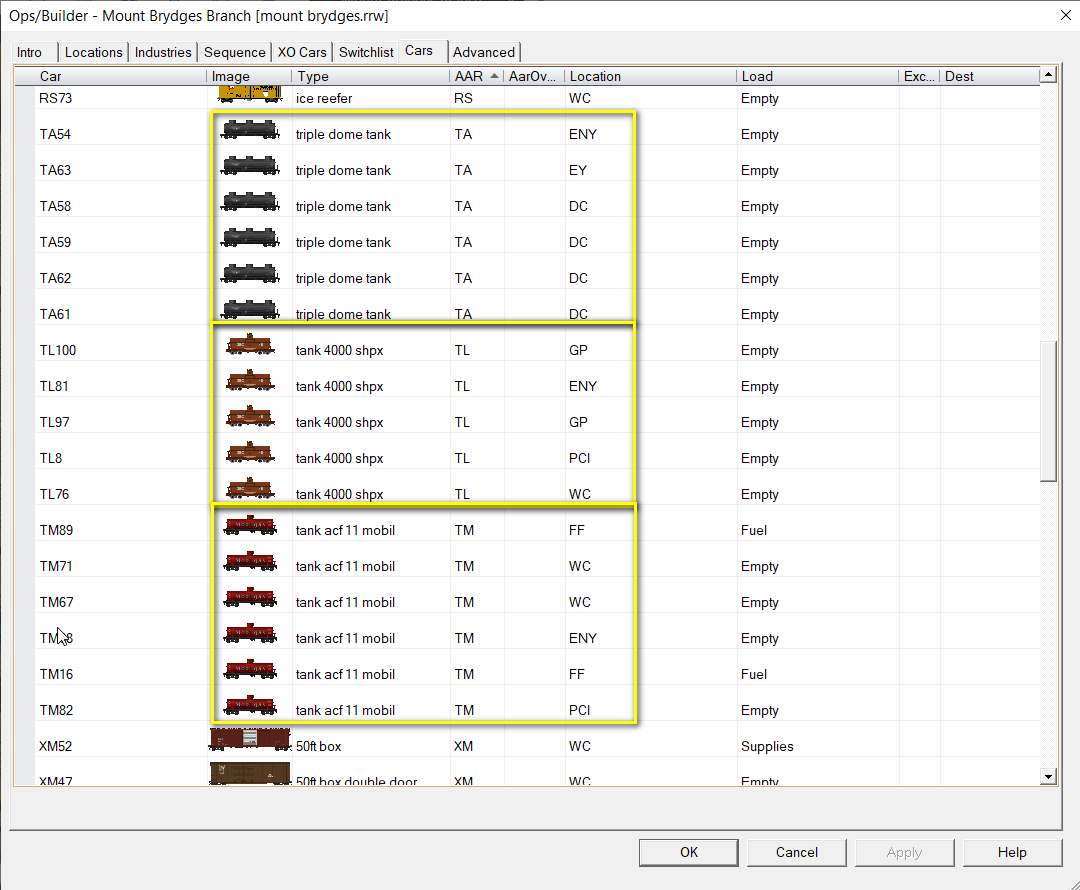
With all our cars in position we can examine the Cars Grid. We can sort this by the AAR column and check for anomalies in the AAR codes of similar but not identical car types.
Often it can be advantageous to use different AAR codes to service different industries as can be seen for the tank cars in this example. We have opted to use only type TA tank cars for industry DC [Davis Chemical], type TL for industry GP [Gallon Paint] and type TM for FF [Foster Fuel]. This ensures that the type TM cars with a Mobil logo will not be tasked to DC or GP.
If you have inadvertently included a car with the wrong AAR code such as XI when you wanted an XM box car. AO provides a way to fix this by applying an XM code in the AarOverride column. This will take effect when we click the Apply button.
AAR Override codes are an advanced topic which is explained in depth in our
Advanced Ops for the Expert guide.
|
|
If you are working on your own layout design this would be a good time to Save the layout before building the Ops grid.
|
Step 3 - Build the Ops Central data grids using the FixOps subroutine
|
|
Open your saved file if you are working on your own layout design.
Alternatively you can use Mount Brydges.rrw from the Advanced Ops Layouts/Tutorials/ folder.
|
|
Adjustments
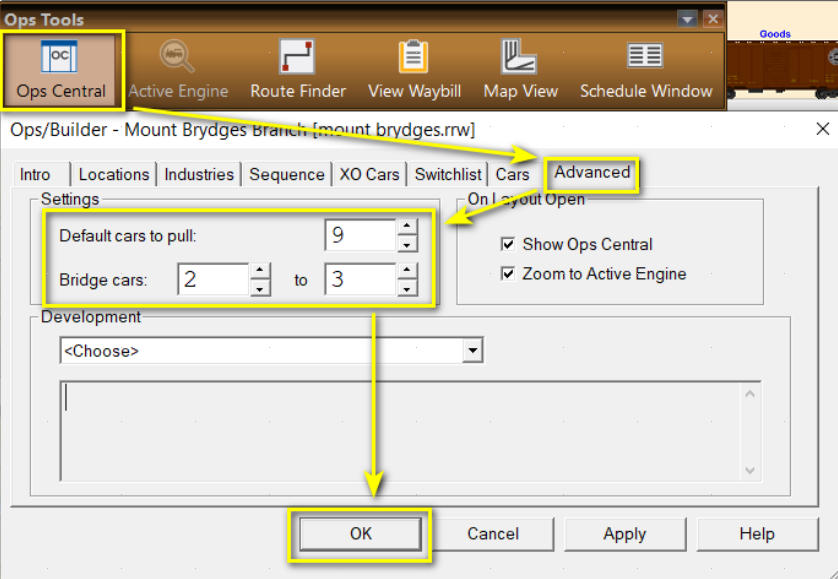
If your Ops plan includes generating trains which alternate between two different Staging yards you can optionally check and adjust the settings for CarsToPull and Bridge Traffic before launching the FixOps subroutine. CarsToPull defaults to 10 cars and the default 'Bridge' car setting is a random value between 2 and 4 cars.
At Mount Brydges we changed our CarsToPull value to 9 cars. This means that each Fast Freight train will deliver 9 cars from the StartAt Staging to the EY Class Yard and pull up to 9 cars (if available) from the Class Yard for setting out at the EndAt Staging.
The modified Bridge Cars setting will add 2 to 3 additional cars from StartAt to travel as Bridge Traffic through to the final destination at the EndAt Staging.
|
Starting FixOps
The Advanced Ops for the Expert guide includes a detailed explanation of how to manually build and test a fully functioning set of Ops Central data.
The FixOps subroutine provides a structured guide to collating this Ops data and building the Ops Central grids to produce a working layout.
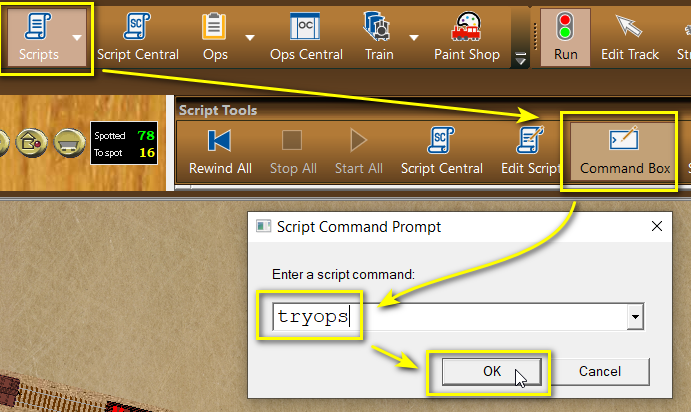
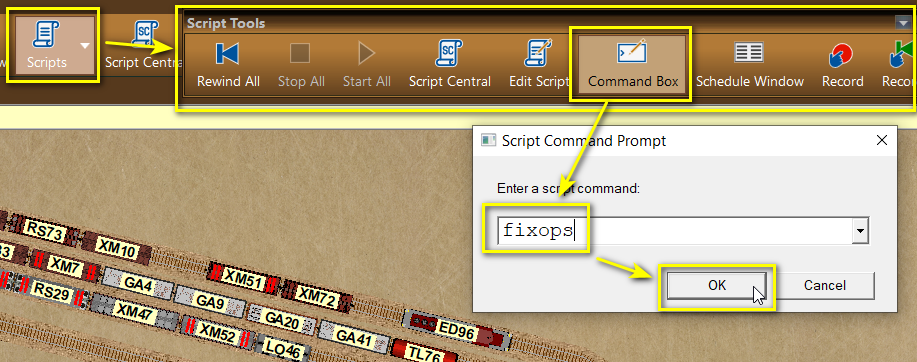
To get started, just type FixOps into the Script Command Prompt dialog which opens from the Command Box button on the Script Toolbar.
|
|


|
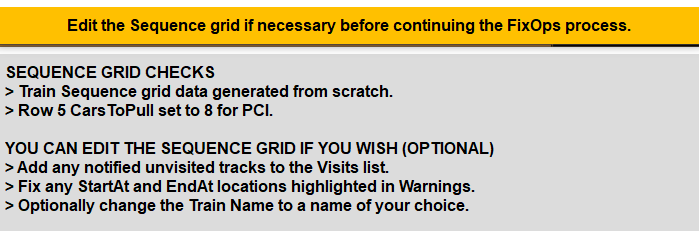
Layout Design Checks
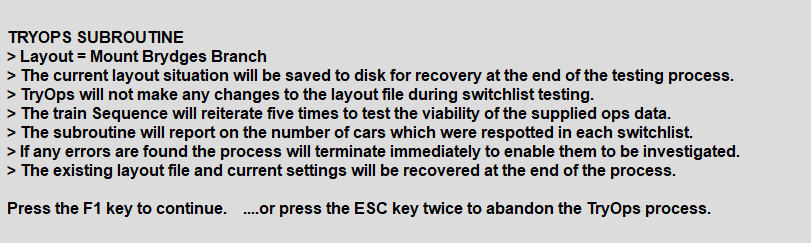
When FixOps opens read the preamble, then press the F1 key to start the process.
Fix Ops will start by conducting some basic data checks to ensure the viability of the layout for operations. These checks will include verifying a workable combination of Staging, Yard and Industry areas, checking and fixing any errors in track labeling and ensuring that Engines, Tenders and Cabooses are applied an XO flag to exclude them from the Industries grid and other Ops data used by the Switchlist generator.
If FixOps fails to locate any critical Ops information, such as a missing Staging yard or the absence of an engine, the process will terminate with an error message.
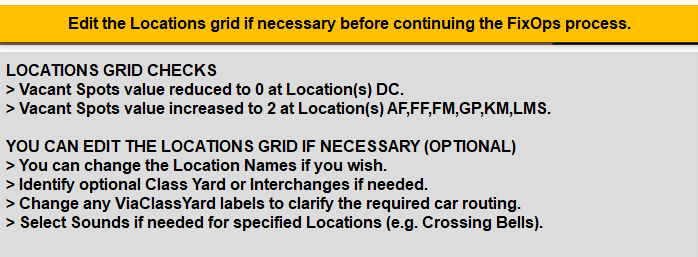
Locations Grid Checks
After completing the basic track and car checks, the subroutine tests the Locations grid for any anomalies. The report will make suggestions for editing the grid and, in some cases, it will fix serious miscalculations automatically.
In the third screenshot FixOps has counted the cars at DC and overwritten the default Vacant Spots value of 1 with a 0 because there is insufficient space to accept an additional car. Vacant spots have been increased to two at some other industries.
|
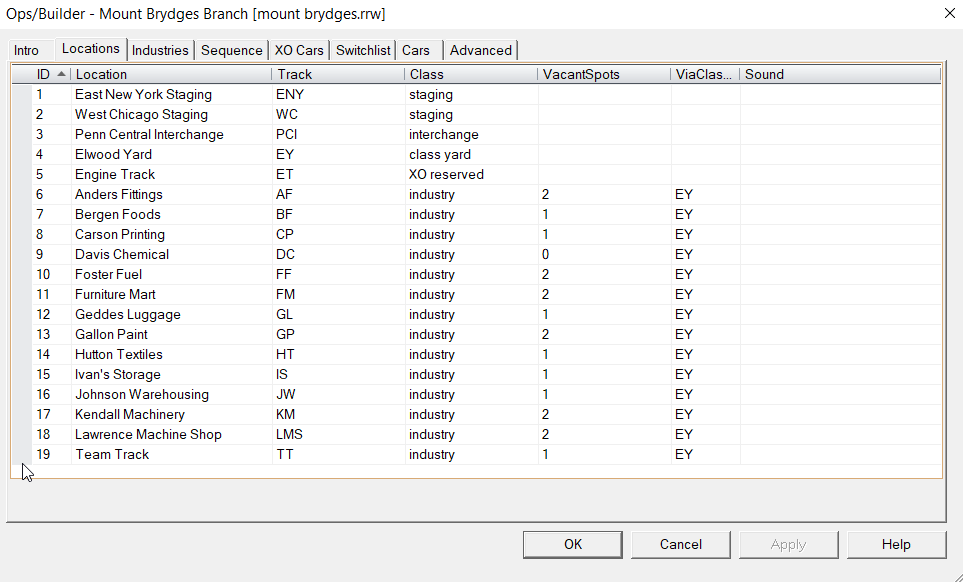
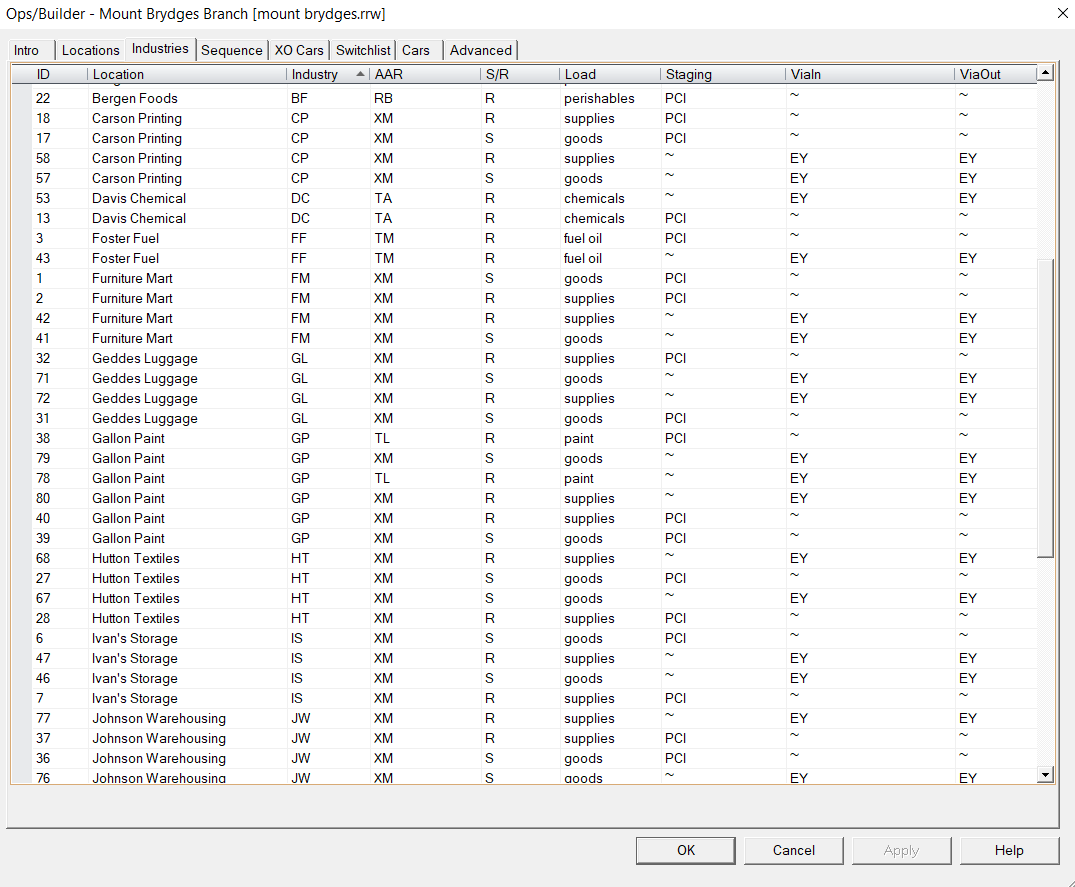
Locations Grid
FixOps has also identified that there is only one Class Yard and assumed that this yard will be used to transfer all cars from the Fast Freights onto Local trains at that location.
If there were no Class Yards on this layout the ViaClassYard column would be shown as a ~ (tilde) character. If the layout had more than one Class Yard the column would also show a tilde which would then require editing manually to identify which of the industries needed to be serviced by each yard label.
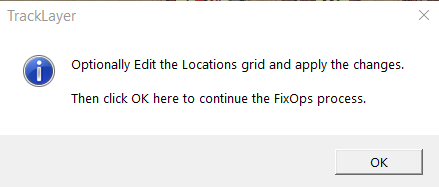
Click OK in the small TrackLayer Alert to move on to building an Industries grid.
|
|
Industries Grid
FixOps may take a couple of minutes to build an Industries grid but this is very much faster than building it line by line.
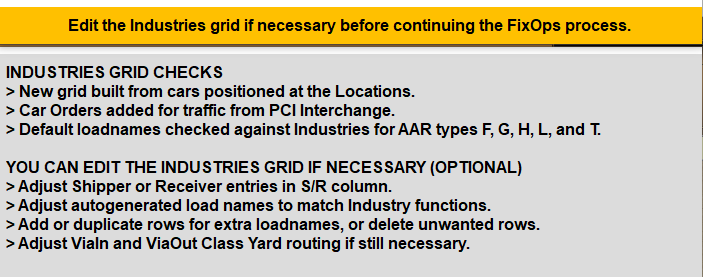
This grid is built from car types you positioned at the industries and contains all the essential data needed to generate the Waybills that will ensure a viable operating sequence. The data in this grid can be edited to customize the Ops scenario.
|
|
Industries Grid Columns
Location column data is extracted from the Location tab and can only be modified on that tab.
Industry column must be a valid industry label which is listed on the Locations tab.
AAR column with a two character code can only use the specified car type to carry the load.
AAR column edited to a single character code can use any car with a matching first character to carry the load.
S/R column
S = This industry ships the named load in this car type
R = This industry receives the named load in this car type.
Load Any loadname is acceptable for a closed car, open cars will also accept loadnames that are not in the TrainPlayer loads database. If no load image exists for a loaded open car then TrainPlayer will use a Tarpaulin Image on the car.
|
Staging column is where the car starts and ends its journey, this can be a specific Staging code or a Tilde (which means that the car can start and end in any Staging area). Cars which start or terminate at an Interchange must use the actual code for the Interchange - tilde (~) cannot be used.
ViaIn and ViaOut column destination codes are used for routing inbound and outbound cars, the codes used must be Class Yards, they cannot be Staging, Interchange or Industry.
Tilde (~) in the ViaIn column means a car travels direct from Staging to Industry without passing through a Class Yard.
Tilde (~) in the ViaOut column means a car travels direct from Industry to Staging without passing through a Class Yard.
Comment column is available to enable a User to enter Notes.
|
Industries Grid
The Industries Grid produced by FixOps for Mount Brydges is fully functional. The subroutine makes use of the existing Build Industries Grid from Cars feature of Advanced Ops to supply one inbound car order (S/R=R) for each AAR car type found at an industry, plus an additional outbound car (S/R=S) for each boxcar, reefer and gondola AAR type.
Occasionally this information will require editing, for example, if your layout included a Cement Works with a couple of preplaced LO closed hoppers, the newly generated Industries grid would include a row showing a car order for a load of cement to be delivered to the industry. This is the exact opposite of what we would require for a cement works and we would need to edit the S/R column to change the R entry to an S so that an empty car order was processed to enable the outbound car to be loaded at the industry.
If you wish it is OK to leave these tweaks for later, or you could make your changes now before proceeding.
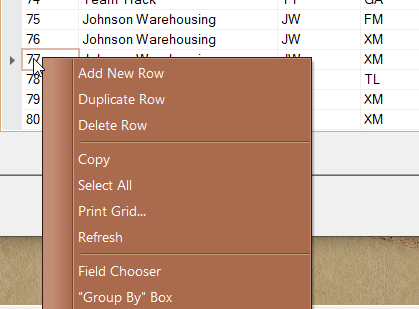
You can right click on any row in the grid and use the context menu to add new rows, delete unwanted rows, or duplicate and edit existing rows to add new loadnames or modify the car types used.
|
When you are satisfied with the data in your Industries grid Click OK in the TrackLayer Alert to generate a Train Sequence for the layout.
|
Sequence Grid
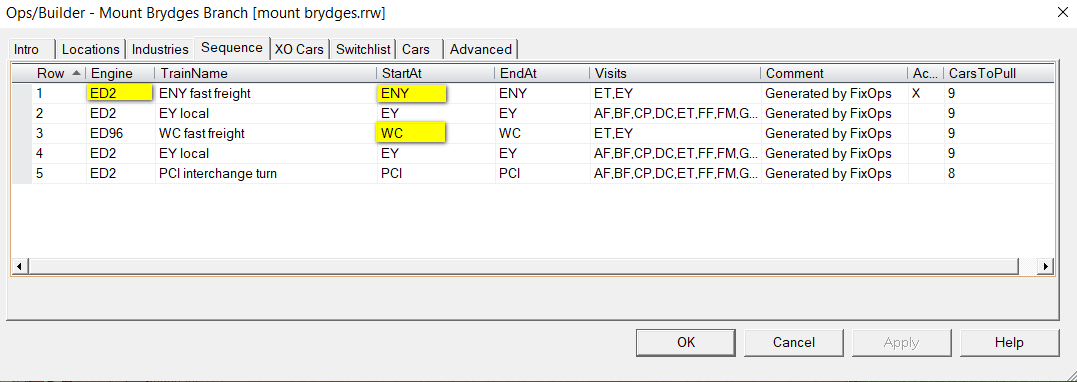
FixOps will now generate a train Sequence grid.
In our example FixOps has provided us with two separate fast freight trains to serve our EY class yard, the first of these uses the local ED2 switcher to pull cars from EY class yard and exchange them with replacement cars from the ENY staging yard in the east.
The other fast freight operates from WC staging yard in the west - bringing in new cars for the local engine at EY and returning the outgoing westbound cars from EY to WC - this train uses ED96 which is a dedicated road engine operating from within the WC staging yard.
The ED2 switcher runs two trains to service the local industries, plus an additional train to exchange cars between the PCI interchange and the industries. Only the local trains are authorized to visit the industries. This is a perfectly viable sequence and if you choose not to make any changes this arrangement will function perfectly well.
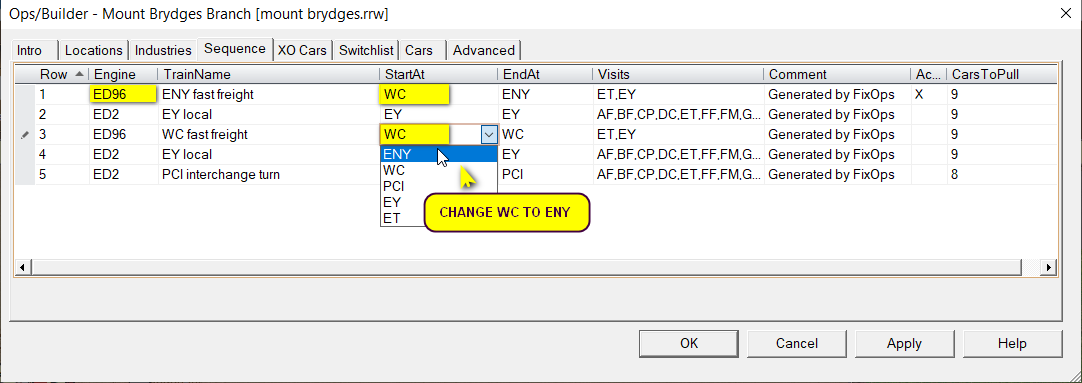
Fortunately the grid rows can all be edited and we only need to change three entries to make the layout operate in the way that Bruno originally intended.
Engine ED96 is currently located in the WC Staging yard which means the eastbound train needs to run before the westbound. So we change the StartAt position in row 1 from ENY to WC (keeping the EndAt position as ENY) and we change the engine on row 1 from ED2 to ED96. Once this first train has been run the engine will be left at ENY ready to run Train 3 back to WC - so we now need to change the StartAt position in row 3 from WC to ENY (keeping the EndAt position as WC). Neither train is authorized to visit any industries but cars heading for the industries will all be set down at the EY yard for distribution by the local trains.
StartAt can't be an Industry. If it is Staging or Interchange it will supply inbound cars for the Industries. If StartAt is a Class Yard there will be no inbound cars, if it is XOreserved only specified XO dedicated service cars can move onto the layout.
EndAt can't be an Industry. If it is Staging or Interchange cars with a matching destination will be pulled from the Industries. If it is a Class Yard only cars with a matching ViaOut code will be pulled from Industries. If it is XO reserved only XO cars with matching destinations can be pulled.
The Visits column contains a comma delimited list of Industry, Class Yard and XO reserved locations which can be visited by the specified train. Only the cars standing at these locations which also have a destination matching the EndAt location will be highlighted for pulling by the specified train. Cars in the StartAt Staging location can only be selected for a train if their next destination already matches a location which is part of the Visits list.
The CarsToPull value is used in two ways. If the StartAt position is Staging or Interchange, the Ops system will supply the specified number of cars to the layout. If the EndAt position is Staging, Interchange or Class Yard the specified number of cars with a matching destination code will be transferred to the yard from the Industries.
|
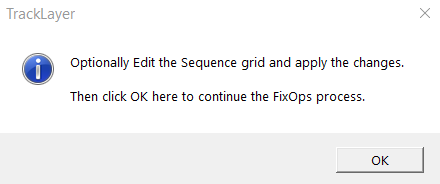
Once you are satisfied with your Sequence grid, Click OK in the TrackLayer Alert to continue.
|
FixOps will review any Sequence grid changes that may have been made and update the XO cars grid data.
|
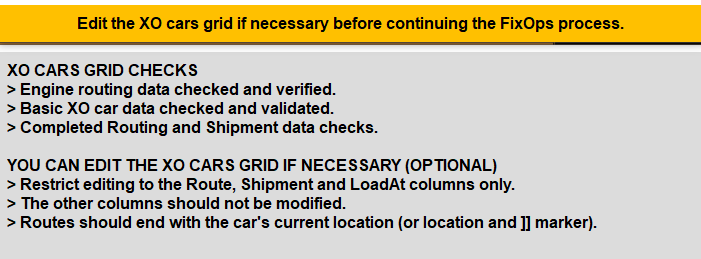
XO Cars
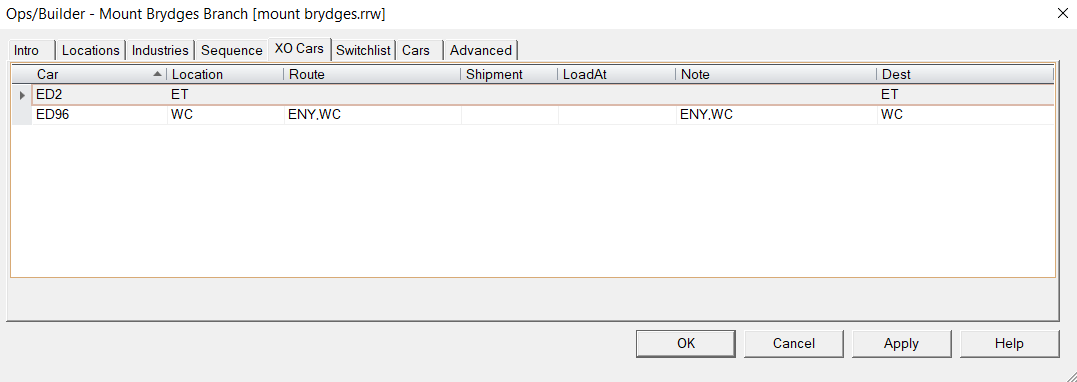
ED2 operates from Location ET to run the local trains, it doesn't need a route because it always returns to its own original spot.
ED96 needs to lay over between trains at ENY so it requires a route to transfer it to ENY with Train 1 and return it to WC with Train 2. Fortunately FixOps has already applied this route for us.
|
Only the Route, Shipment and LoadAt columns should be edited, all other columns are updated by the Ops system.
As Shipment and LoadAt data does not apply to engines we are interested only in the Route column at Mount Brydges
XO dedicated cars, block trains and passenger trains are dealt with in detail in the Advanced Ops for the Expert guide.
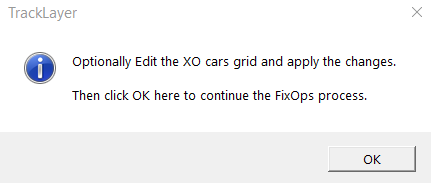
We are good to go and can Click OK in the TrackLayer Alert to move on.
|
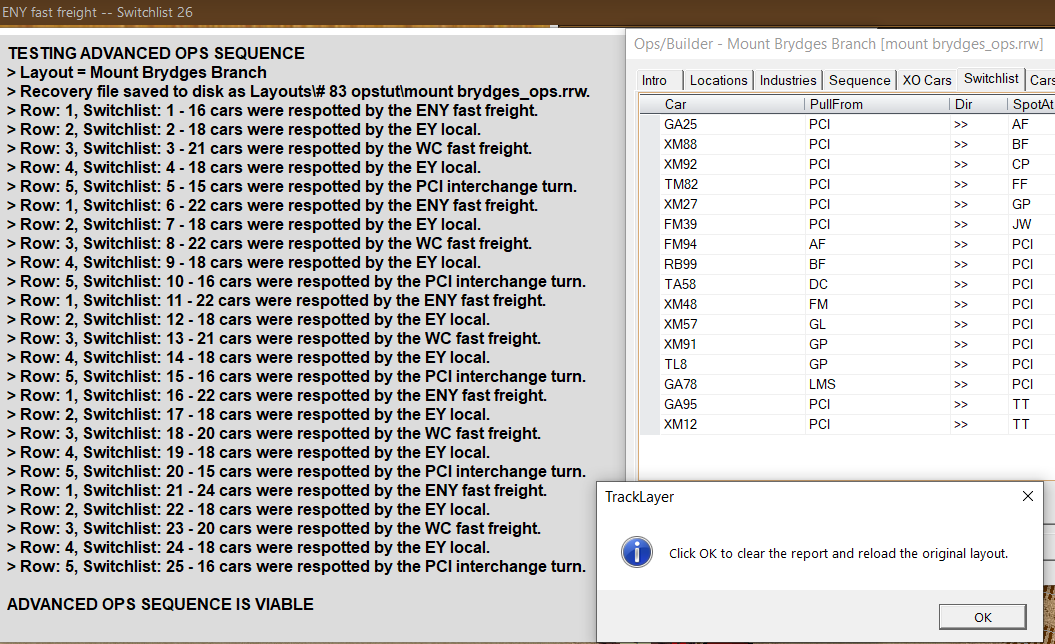
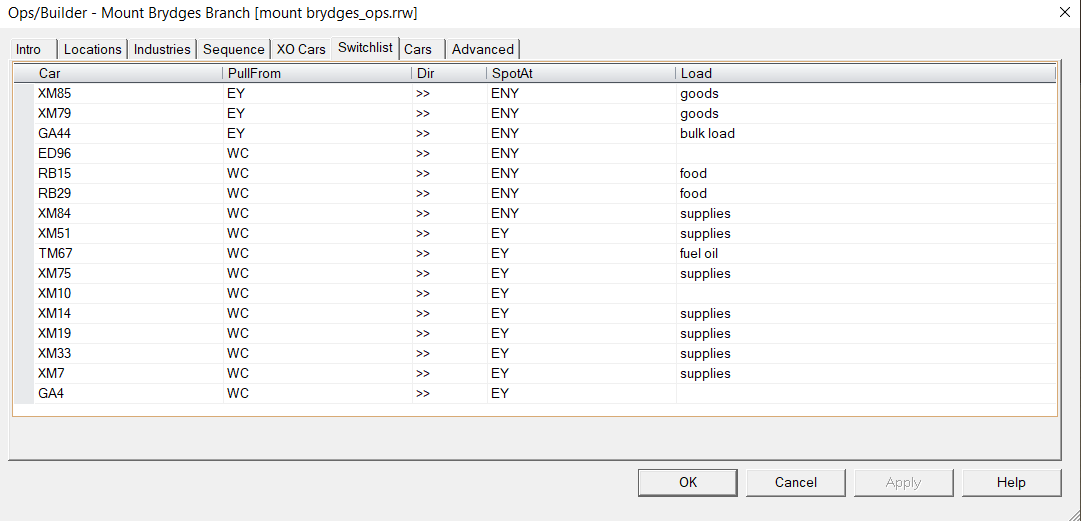
Switchlist
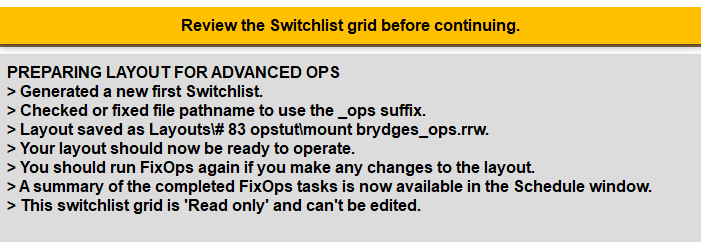
FixOps generates a new switchlist and saves the finished Ops file to disk in the original folder.
This Switchlist is for information only and can't be edited.
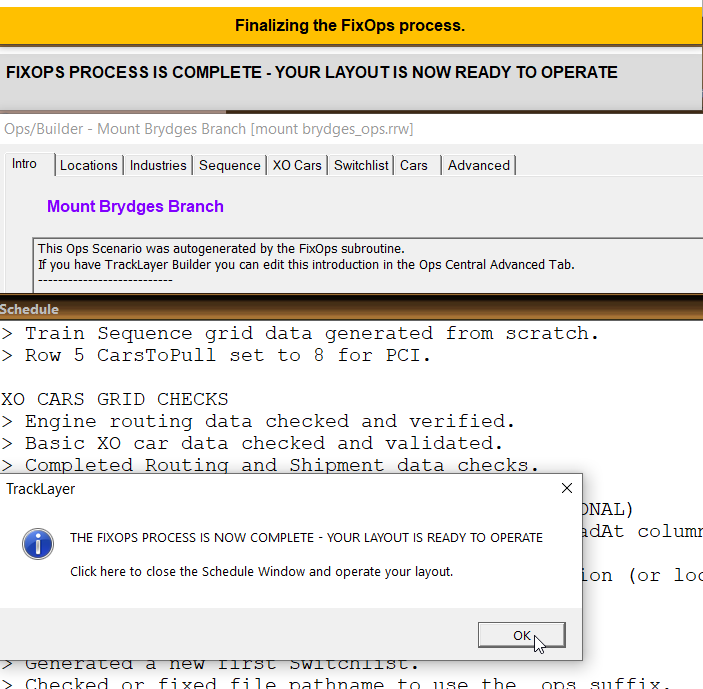
Click OK in the TrackLayer Alert to open the Schedule window and review the whole process.
|
|
|
All done
FixOps is completed. You can review a summary of all the steps used to build the Ops sequence in the Schedule window.
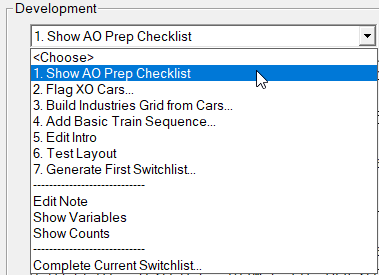
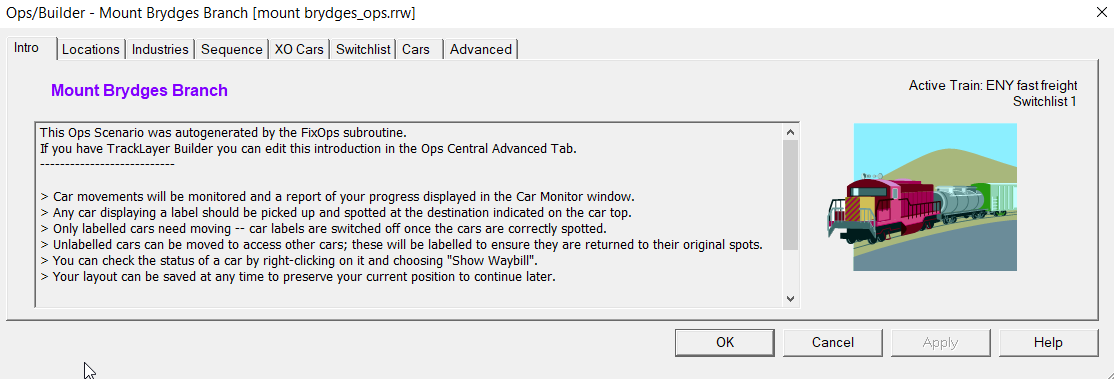
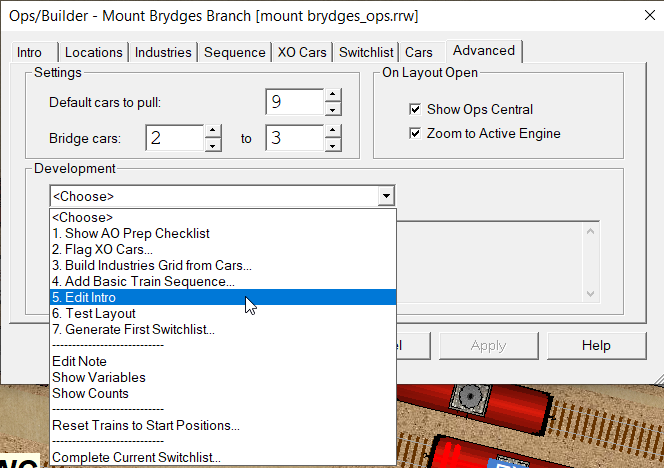
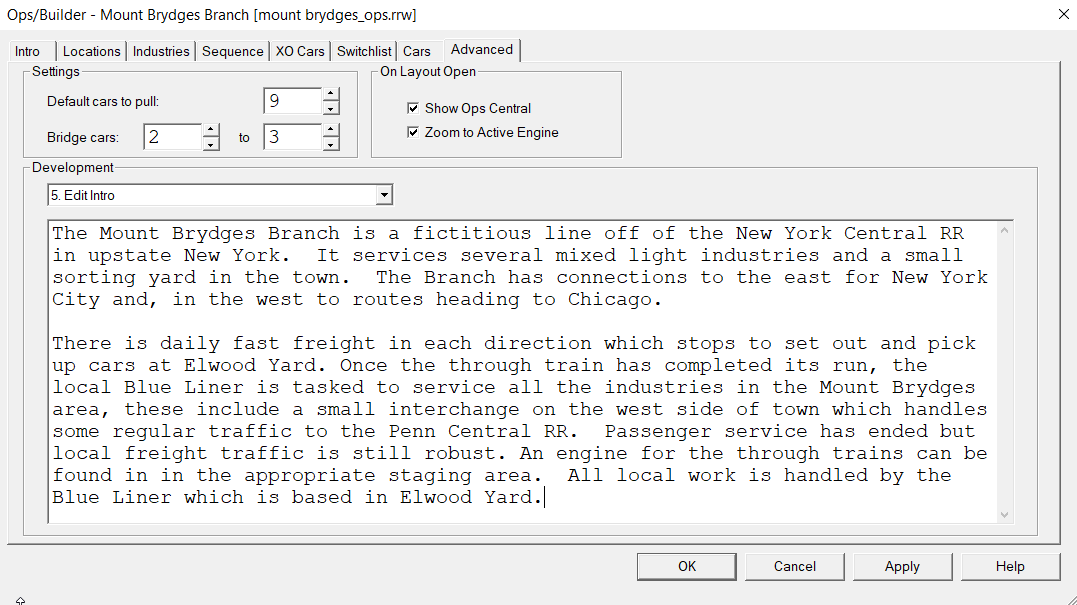
If you want to edit the information on the Intro tab you can do this from the development menu of the Advanced tab.
Click OK in the TrackLayer Alert to operate your layout.
|