www.trainplayer.com SupportNewsAboutContact
      HOMEPRODUCTS  TRACK PLANS     NEWSLETTER     FRIENDS

How toChange Default Cars to Custom Cars

Contents


In this Clinic, we will show you how, in TrainPlayer 3.3.1 to change the Standard or Defualt car set into a custom car set that represents your favorite railroad line. 

Some basic understanding of Windows Explorer is assumed, before you start this project!!


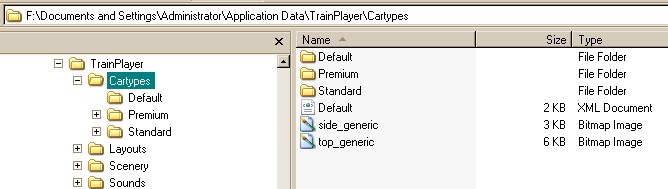
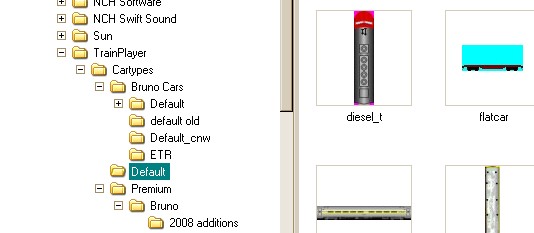
Step1 - Locate and Open Default Car collection

If you're running Windows XP, open Windows Explorer and look in this directory: C:\Documents and Settings\Username\Application Data\TrainPlayer\Cartypes


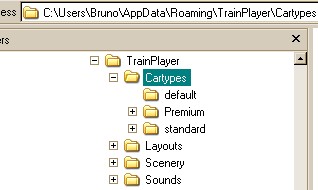
If you're running Windows Vista or Windows 7, then look here: C:\Users\Bruno\AppData\Roaming\TrainPlayer\Cartypes


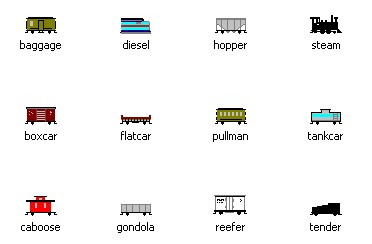
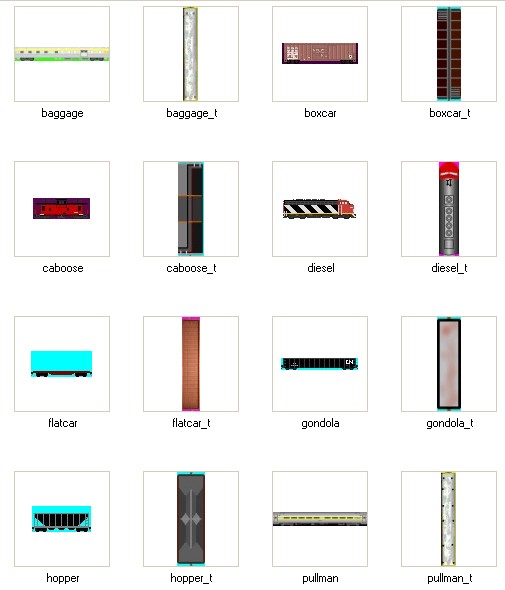
Step 2 - Changing the top and side images in your Default folder

The important point to remember is that you MUST keep the names of the car side and car top images identical to what appears in this folder.  You do NOT need to touch the deafault.xml file at all.

Open the Default folder in Windows Explorer and change the View setting to Show Thumbnails. You will see all of the images paired up side and top image, all in BMP [bitmapped picture format].  Make note of the names of each car type


 Next, go through your various car collections in Windows Explorer and find your favorite cars to match these exact names
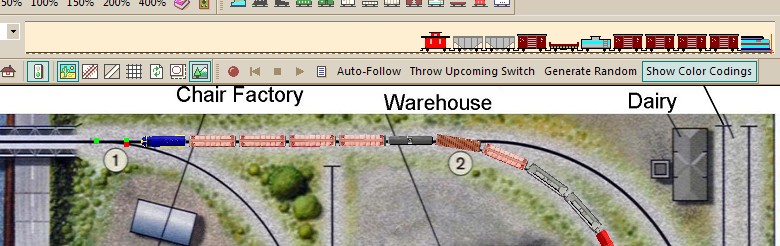
 and assemble them into a new folder. Let's name that folder "default_new".   Your new collection may look like this in Windows Explorer:


It is CRITICAL that all car side and car top images be in the bitmap [bmp] image format.  If the image you want to use is in either GIF or JPEG format, then, in Windows Explorer, right click on your image and from the pop out submenu, select "Open with Paint" .  This step will open your chosen image in MS Paint. In that program, choose File\Save as, then save the image as  a 24 bit BMP file.

Step 3: The Big Switch

Now that we have our new Default cars selected and ready to go, let's go back to Windows Explorer and re-name your existing Default folder to "default_old".  Once you have done that, click on your "default_new" and re-name it to "default".  When you're finished with that step, your Explorer file tree may look like this:


In my case,  I have some new car collections that I am working on that are not on either my Local or my web car chooser.  Those sets are gathered into a folder called "Bruno Cars".  What I have done is placed a copy of my "default old" and my default_cnw" sets in this folder as well.  The reason for that is to avoid having to do all this work over again should you need to re-load the entire TrainPlayer program with its Default car set.

Before the Change:


After the Change:


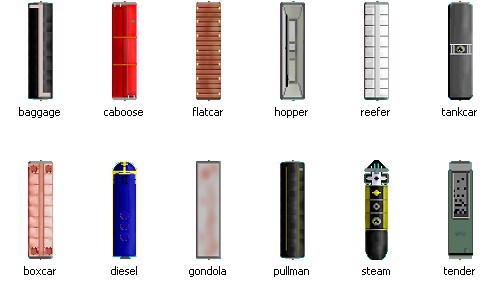
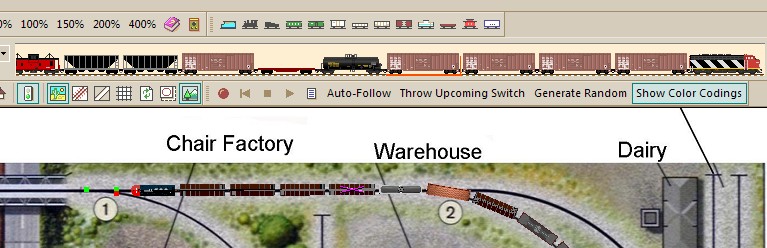
After you've made the change in your Default cars, every time you select "Add a car" to train and pick one of the 12 basic models, TrainPlayer will insert your car side into the Train Window and your car top into the actual layout.  Cool!!!

 I can hear it now.  How do I make my Train Window that big???  - Learn to Customize!!

Enjoy!!


Changing the Car sides and Tops in your Default folder

The Big Switch

After the Change

  Copyright © 2005 - 2014, TrainPlayer Software