|
|
|
|
|
Creating a Scenery Image with Microsoft Paint |
Contents | |
|
This is
a "how to" guide to show you how easy it is to create your own images to use in
TrainPlayer 3.3. The image will be
created and saved in MS Paint – a simple but effective drawing program packaged
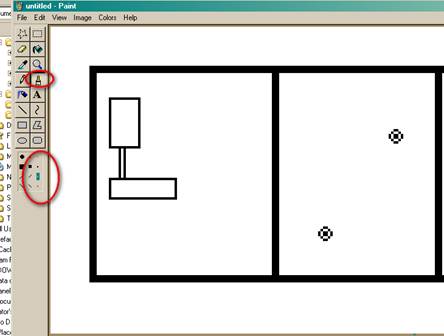
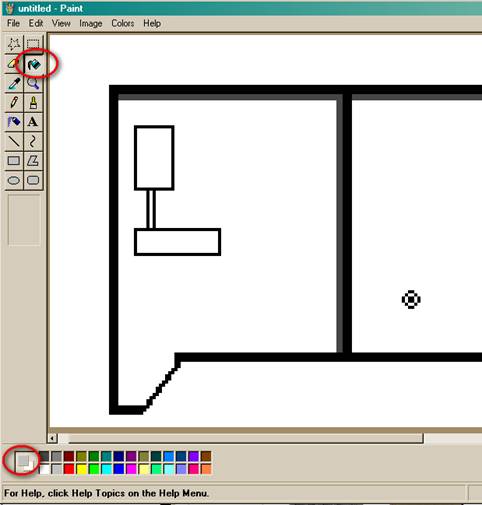
with either Windows XP, This is
the basic opening screen showing, on the left side, the various tools available
to you and at the bottom – your basic color tray which can be significantly
expanded 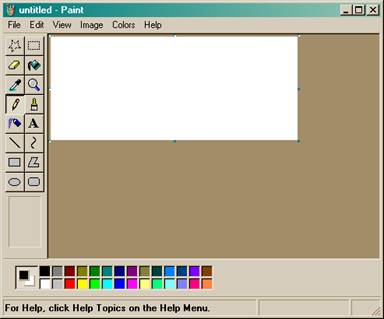 Creating your own bitmap image
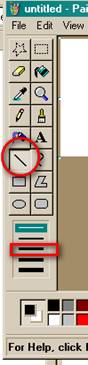
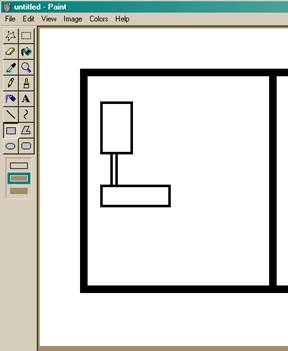
We want
to select the 3rd line width available to make our building foundation.
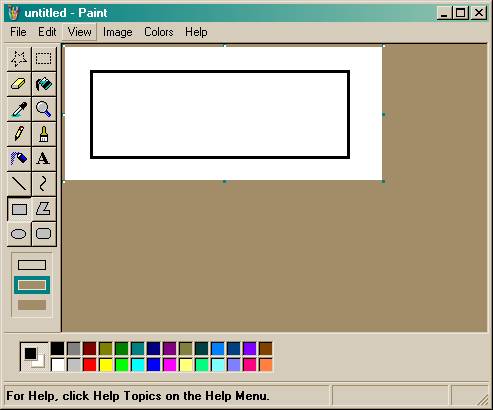
Once you have selected the width, select the square/rectangle tool and
draw something like the following
Now,
using the same tool, divide the wide rectangle into some smaller units.
Use the crosshairs to line up the new section accurately.
There is no need to be evenly divided between units.
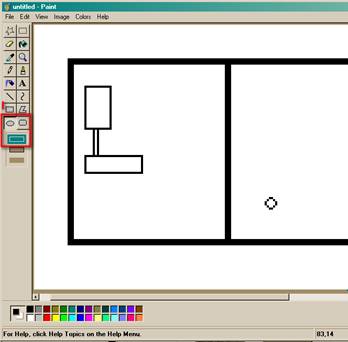
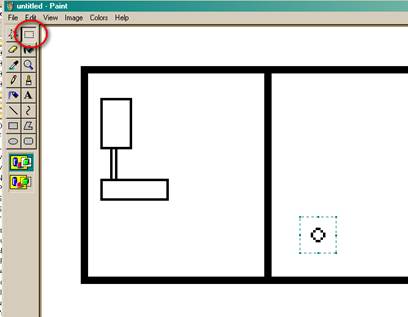
Using
the select tool, draw a tight square around your new roof vent.
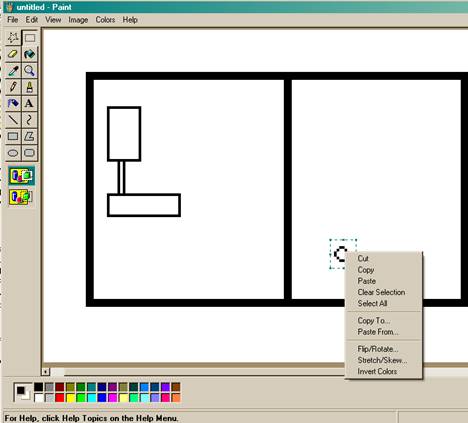
Use a
right mouse click to bring up a submenu which will allow you to copy your roof
vent. Right mouse click again and
then click on Paste. This action
always places a copy of the selected image in the top left of the open Paint
window with an “active” box around the image. You can now click and drag that
image and locate it wherever you want on your drawing as shown below..
To add
a bit more detail to the roof vent, select the Brush tool which gives you 3
shape profiles, each with 3 width sizes.
Select the smallest angle brush and use both a left and right profile to
produce the “vent stack” seen in the drawing above.
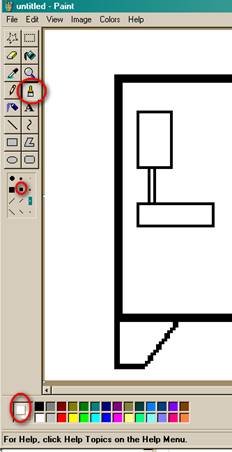
Now we
are going to add a small alcove on the left side of our warehouse, using just
the Line tool to do both the straight and angles sections.
With that completed, lets connect the alcove. Select the Brush tool with
the medium width and use White in the Foreground color to remove the wall
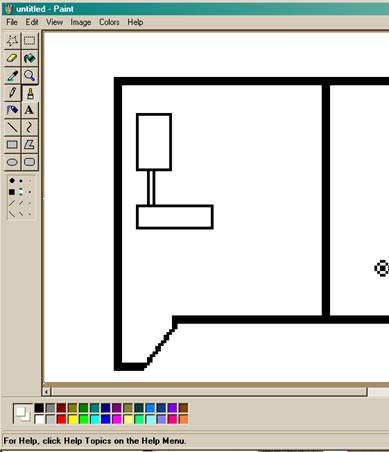
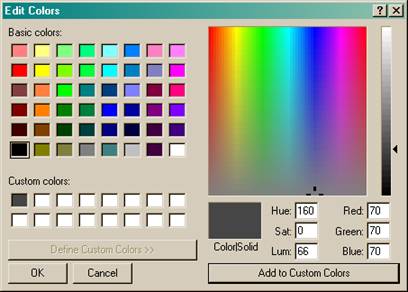
section in the alcove. Next we
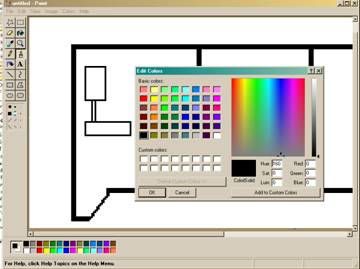
want to add some shadow effect along the Roof line. Double click on your basic
Black colour to bring up the enhanced color tray below
Use the
slide bar on the right hand side to select a nice charcoal gray look and then
press “Add to Custom Color” to add it to your Color Tray
Use the
Line tool set a width2 and add the shadow line along 2 walls of each unit’ as
seen below
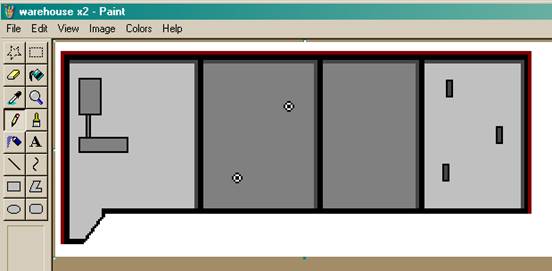
Next
select the Fill Tool (ink bottle) and pick the light gray from your Color tray.
Use Fill to paint two of the roof tops light gray and then select the
darker gray to fill the other two roof tops.
For the roof fixtures, use the appropriate contrasting gray color to help
that feature stand out.
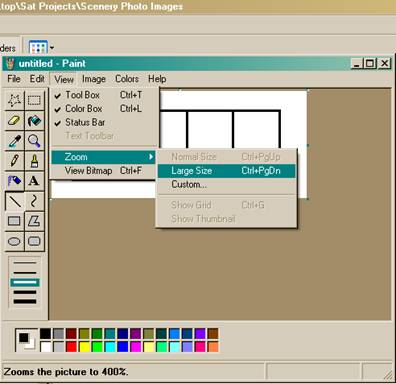
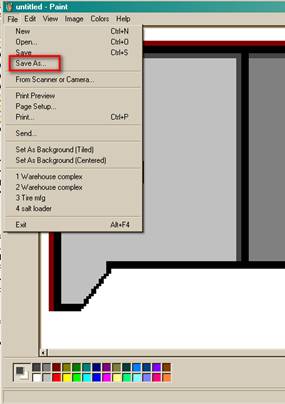
Next
locate your Scenery image files which are generally found here: Your
final image may look something like this:
|
|


| Copyright © 2005 - 2014, TrainPlayer Software |